|
A sentinel in 1/76th Page II - building and improving the kit
So you have not built many kits before. What do you get, and what do you do with it? The kit arrives in a black box with an orange top. The first step is to clean up any flash round the edges of the parts. A fine file or knife may be used. I work almost exclusively with a Swann-Morton scalpel, and I have the scars on my fingers to prove it. It is always good to get to know the parts of a kit and dry fit them before reaching for the glue. Careful study of the instructions really helps. Matador instructions are thorough. They are designed with the fact in mind that not everyone has references on the model they are building: we want to satisfy the experts if we can, but not everyone out there is an expert. The second step is well worth the time it takes. Washing the parts in a mild detergent cuts the grease left from the moulding process. It may take an age to dry, but having bonds fail later is too high a price to pay for skimping on time. Only then can construction start. A word is in order on glues. Like any other group of alleged experts modellers disagree on glue. Some have the skill to solder white metal kits. If you have not, standard advice is to use two-part epoxy on the big bits and superglue on the small. Two-part epoxy is a pain to mix but it gives a strong result, and in kits where the fit is bad can act as a filler. Fortunately the fit is generally very good on the Sentinel kits. If you are launching into the hobby, you will find that the superglues on the market vary significantly in their characteristics and viscosity: modellers have their own preferences.
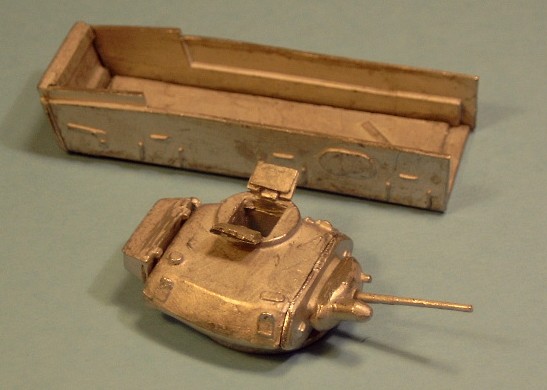
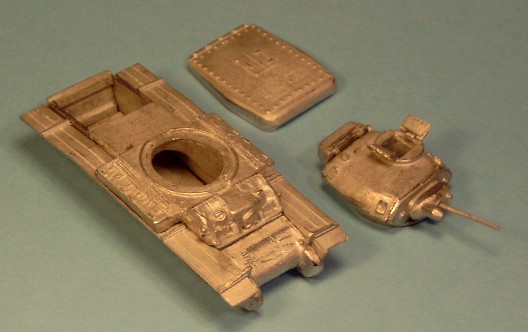
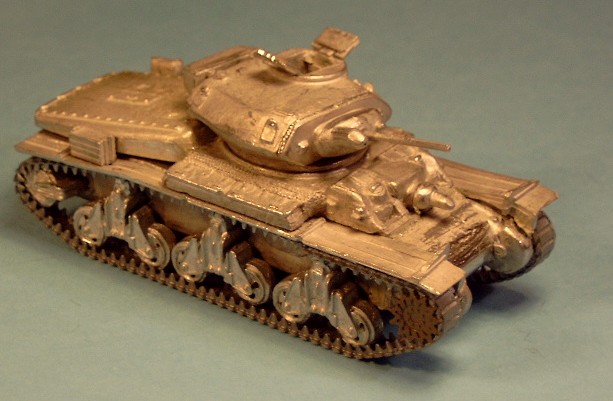
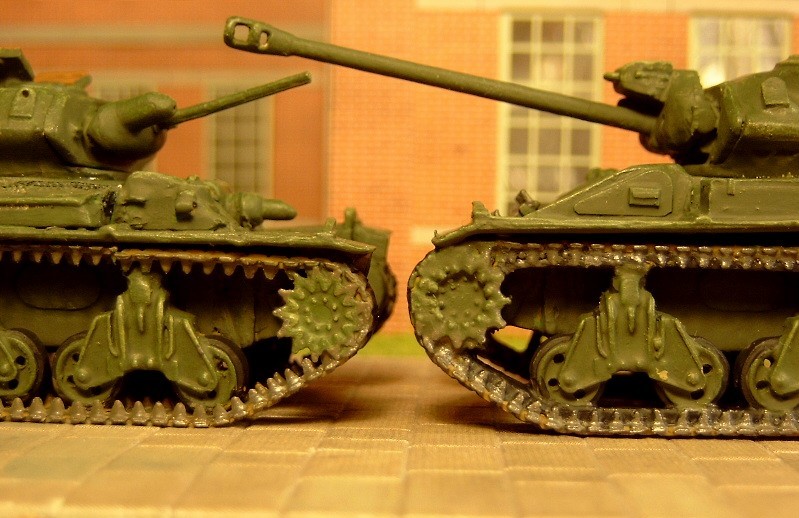
A considered compromise in the kit is the mesh either side of the turret. The Mk IV prototype has no stowage boxes and the air ducts are visible. It makes an interesting comparison, and perhaps this area offers scope for the super-detailer, but in this scale careful shading of pre-moulded mesh will give an effect little different from what could be achieved by slaving over etched brass, which is emphatically not a material for the beginner. Leaving the masochists to fiddle with the meshes we turn to construction. Parts 9, 10 and 21 need to be offered up to the base assembly, and glued only when you are confident that the mudguards are in the correct position. They must fit into the grooves in the hull sides so that they hardly project outside the stowage boxes either side of the turret ring. The fit is absolutely tight, and needs care. Undue haste and failure to get this right is perhaps the easiest way to ruin the finished model. Next comes part 8. Here is another compromise, and the second minor criticism of the kit. The rear deck and its engine hatches are moulded as a separate part, whereas of course the deck is in real life one piece with the rest of the forward upper hull. It is advisable to dry fit with the turret in place. If part 8 is placed too far aft there will be too much light showing under the turret bustle. If it is too far forward it will foul the turret. Once the deck is correctly positioned and glued, a little filler is required to cover the join, which, as the original is a casting, is not sharply angled but curved. The turret largely hides this, but we want ours just right. All the little pieces should be fitted at the end, when the main assembly is completed and hard. The last major construction is to add the tracks. Here Matador's position in the spectrum of kit construction is made clear. These are one-piece castings. The advantages are clear. The modeller is spared the difficulties of construction. The bogies are correctly spaced and the clear locating points on parts 17 and 18 mean that it is easy to get the tracks correctly positioned. The basic detail is good. The bogie assemblies were one of the best parts of the original master from Eastern Europe. However, a certain amount has been lost in casting and the mould line which runs through the representation of the rubber blocks takes careful cleaning up. Inexperienced modellers should be warned that this is precisely the sort of thing which shows when you come to highlight, and can let down a whole model. Moreover, undercutting is impossible with metal construction. This means a solid track and loss of detail on the return rollers and inside the front sprocket. If a precision job is required, the modeller may cut out and clean up the bogie units and rear idlers, jettisoning track and sprockets. The gap between the rear idler and its mounting is tiny in real life so there is no problem with this part, as long as shading is applied to the crack. The bogies will benefit from a saw cut to increase the depth of the gap between the bogie frame and arms. The return rollers will need to be rebuilt. The bogies and idlers may be glued to the hull and M3 Grant/ Early M4 Sherman-style sprockets and early M4 rubber block track added.
It takes time, but undoubtedly this is the way to make a really first class model. A compromise which will look just as good under all but the closest scrutiny is to take care to paint the inside of the track dark. Black is too fierce. Better is to use the mixture of black and dark earth which gives a good tyre grey. The rubber tyres of the road-wheels are in the same colour. A little highlighting of them and careful painting of the teeth and links, and the inner track fades into obscurity. Whether or not the track is replaced, it is well worth the effort of drilling out the holes in the road-wheels.
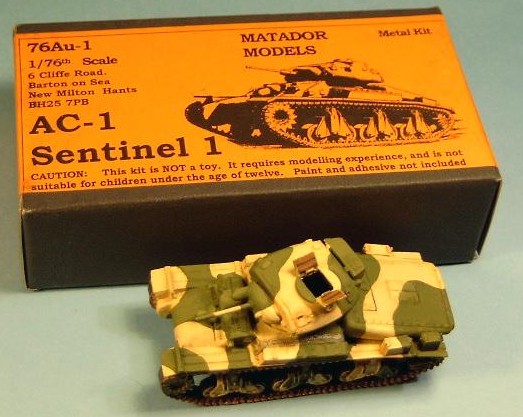
Matador Models would no doubt rather you bought both vehicles (indeed preferably three) at the same time, and built them together. Construction of the lower hull is as for the Mk I. While it is hardening, the AC 4 turret can be built. It is better to leave off the optional conjectural parts. If the holes look too stark, the vehicle can be crewed with a scruffy mixture of military and civilian figures. There is a hull hatchway that cries out for a driver. In order to maximise the number of common parts, and minimise mould costs, the same lower hull sides have been used as for the AC 1. To avoid daylight showing under the rear deck, two additional plates - parts 15 and 16 - are needed. This may not be a beautiful solution to the problem but it saves padding the underside of the rear deck before fitting. It is very important to fit the rear deck correctly, the procedure being the same as for the AC 1. The absence of tinwork makes for an unbalanced, indeed ugly-looking vehicle. It also draws attention to the upper run of the track, which may need careful cleaning up. This is not the place for extended comments on painting techniques. Surviving examples of the Sentinel I appear in sand over-painted with a bold pattern of green but the photographic evidence suggests that the model of the prototype Mk IV should be finished in overall green or khaki and above all heavily dirtied and weathered: test-firing the twin 25-pounders must have kicked up an impressive amount of dust. Those new to model building should note the importance of an undercoat. It not only gives great strength to the final finish, but also shows up any imperfections before the final coats go on. The whole vehicle really benefits from careful weathering and shadowing, and this is essential for the tracks if they are not to detract from the effect. The best advice is to look at real vehicles, and especially tracked machinery, that has operated in conditions similar to those in which the model is to be depicted. Dusting can cause very delicate gradations of colour, while splashed mud can leave dramatic and hard-edged patches, and change colour and texture equally dramatically as it dries.
See more pictures of the Sentinel Mk I, and the prototypes. |
